Installer Commissioning Guide #
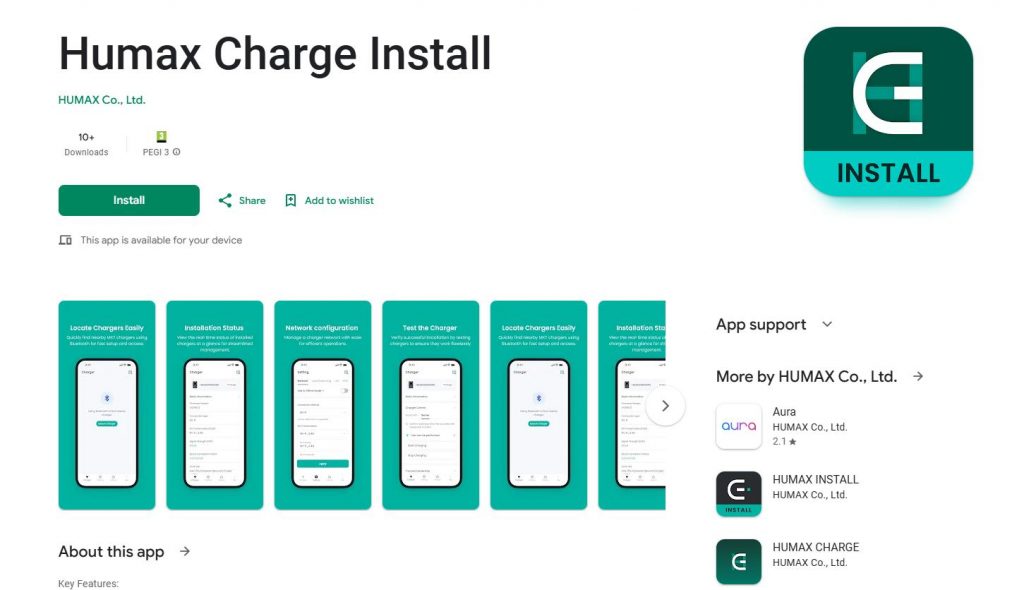
1. Download the Humax Charge installer App. #


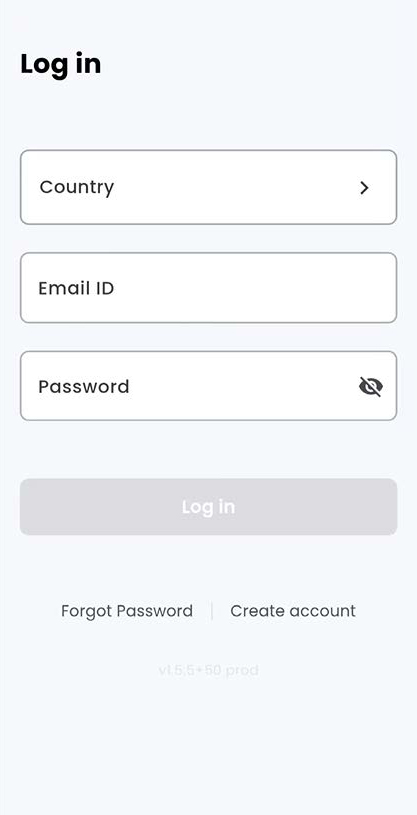
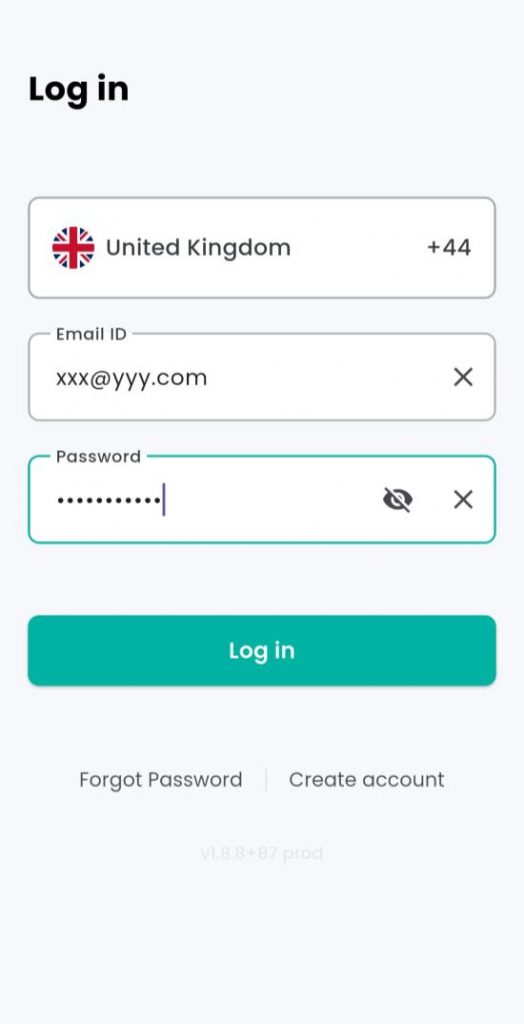
1.1 Log in #
Enter your login credentials.
If you do not yet have an account, select ‘Create Account’ to register and obtain your login details.
Once your account has been successfully created, please proceed to enter your login credentials.
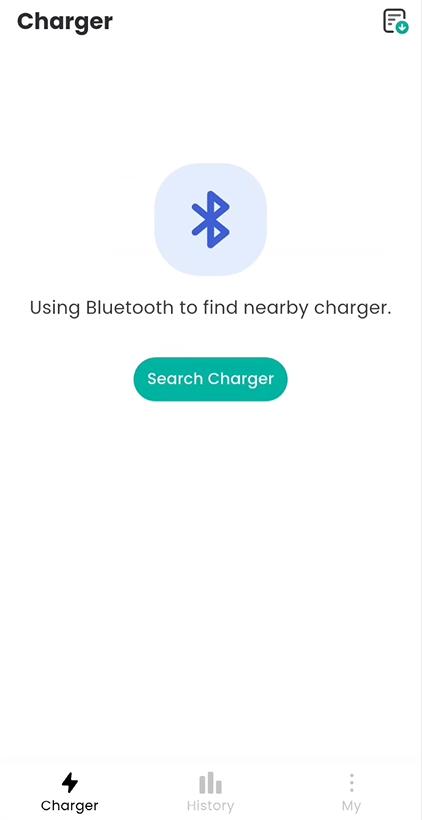
1.2. Connecting the charger #
Activate Bluetooth on your mobile device, then select ‘Search Charger’.
Locate the corresponding serial number of the device.
Please note: if you are installing two or more chargers, it is essential that you pair each one using the correct serial number.
For a faster connection, keep your phone close to the charger
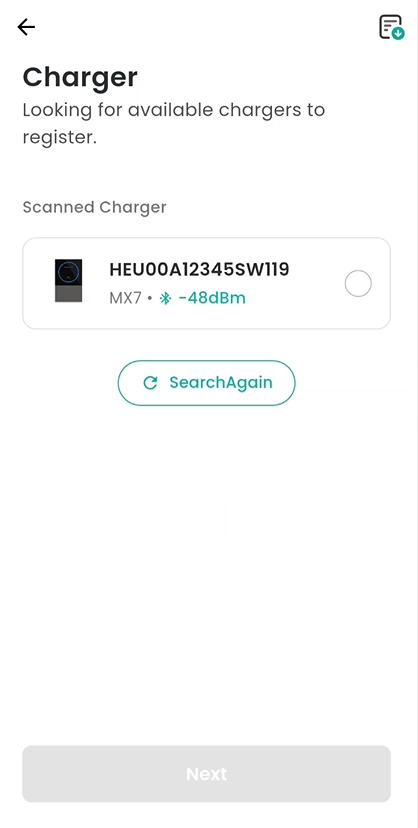
Note:
If the charger cannot be
located, please reboot the device.
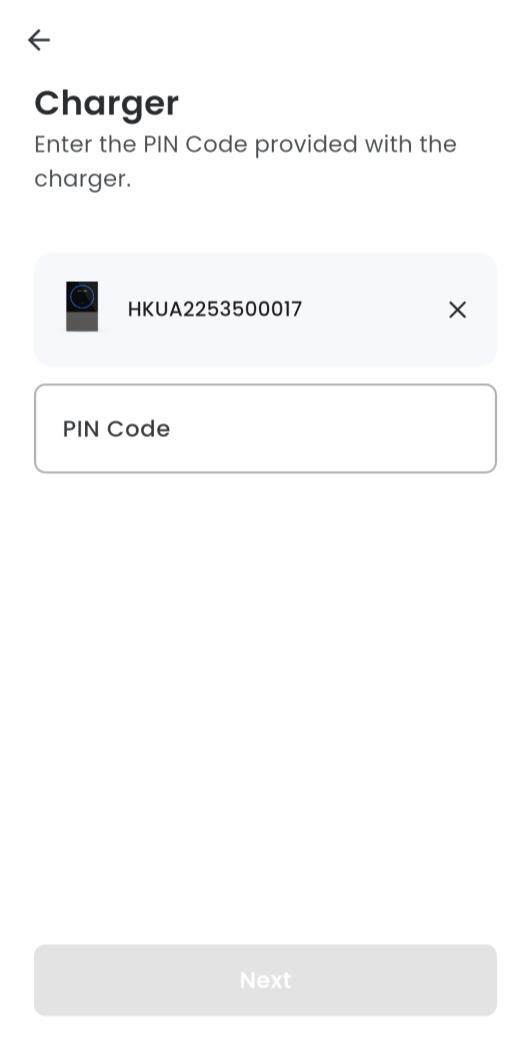
Enter the PIN code. The PIN can be found at the back of the user manual.
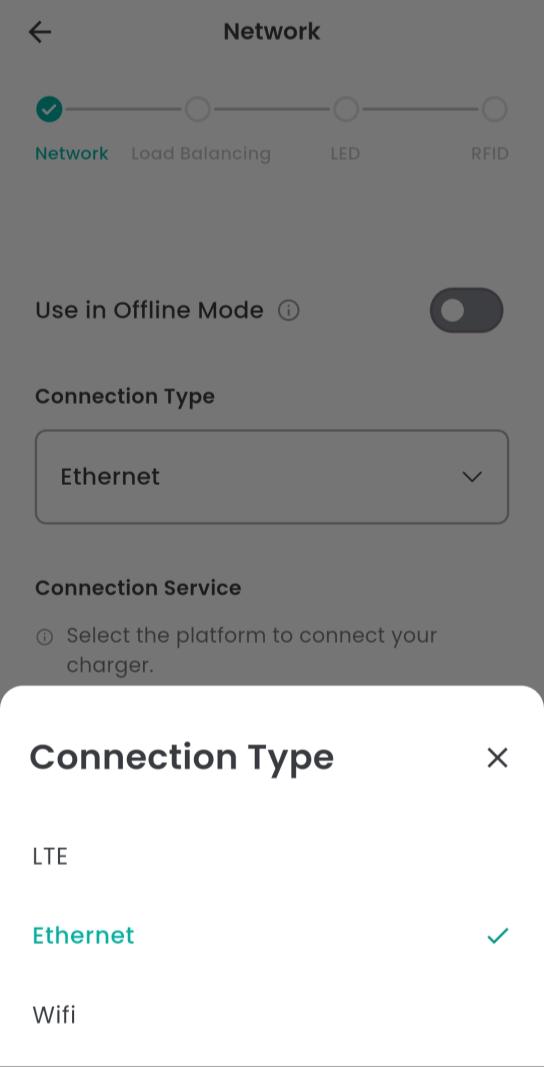
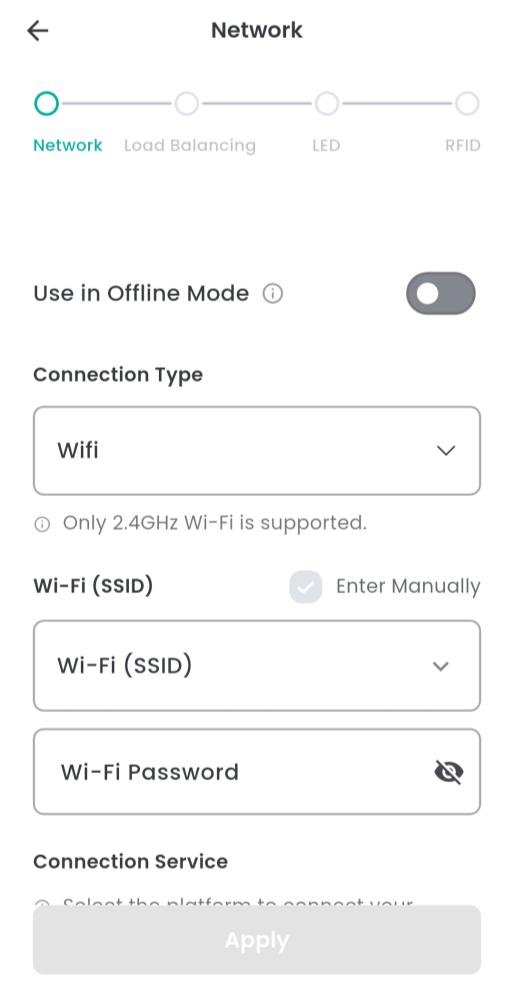
1.3 Connecting to the Network #
Connect via Ethernet
Select Connection Type
LTE –*Not supported
Ethernet
WiFi
Select Ethernet from Connection Type
Recommended if the Wi-Fi network is unavailable.
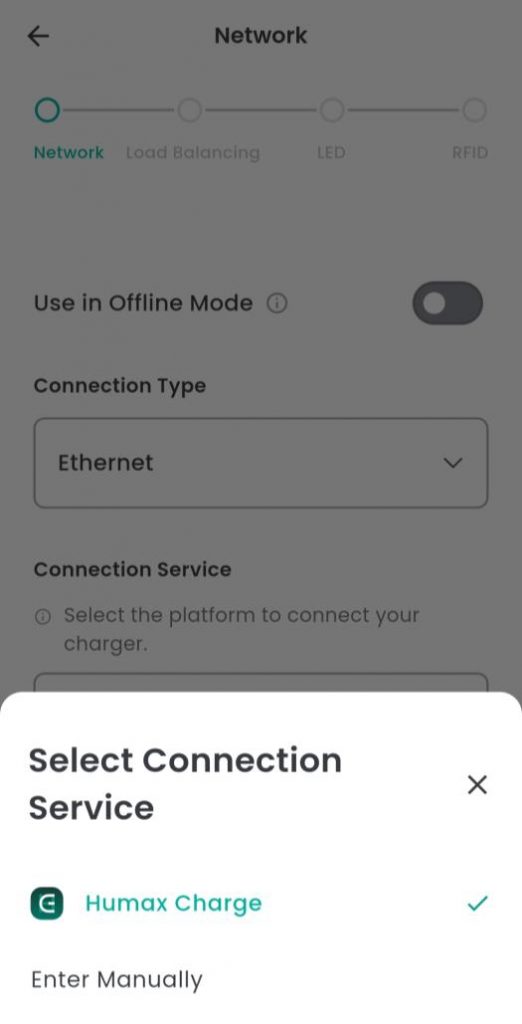
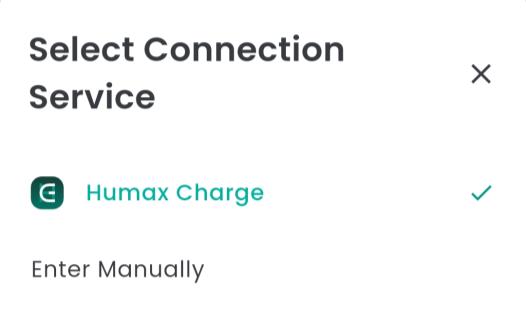
Connection Service
Select Humax Charge
OCPP URL for Humax Charge is: wss://uhc2-server.humaxcharging.com:443
Connect via Wi-Fi
Select Connection Type
LTE – Not supported
Ethernet
WiFi
Select Wifi from Connection type
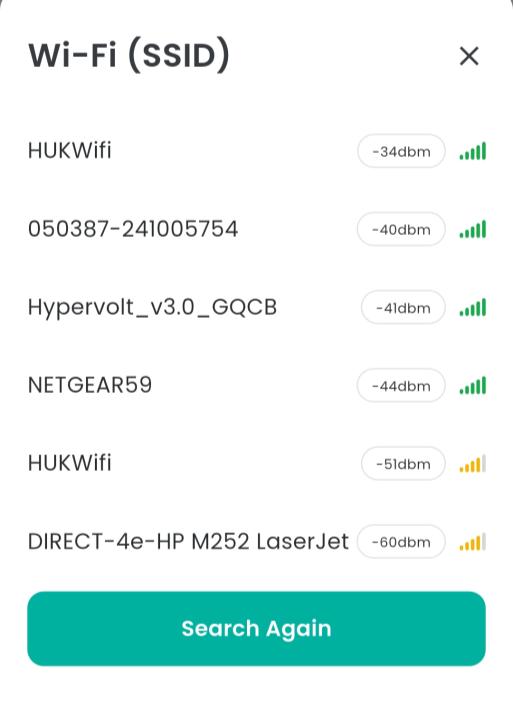
Tap ‘Wi-Fi (SSID)’ field to start scanning SSID around the charger
Select SSID you want to connect charger and enter the password
Connection Service
Select Humax Charge
OCPP URL for Humax Charge is: wss://uhc2-server.humaxcharging.com:443
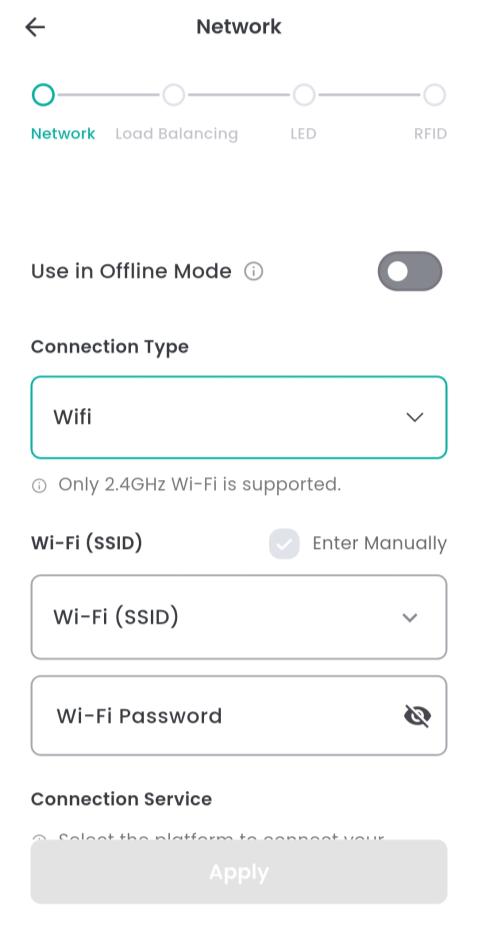
Offline Mode
Use in Offline Mode only when neither Wi-Fi nor Ethernet is available.
The charger must be kept in a secure location accessible only to authorized personnel, as the charger cannot be monitored via the app in this mode.
Charging can only be started and stopped using RFID cards.
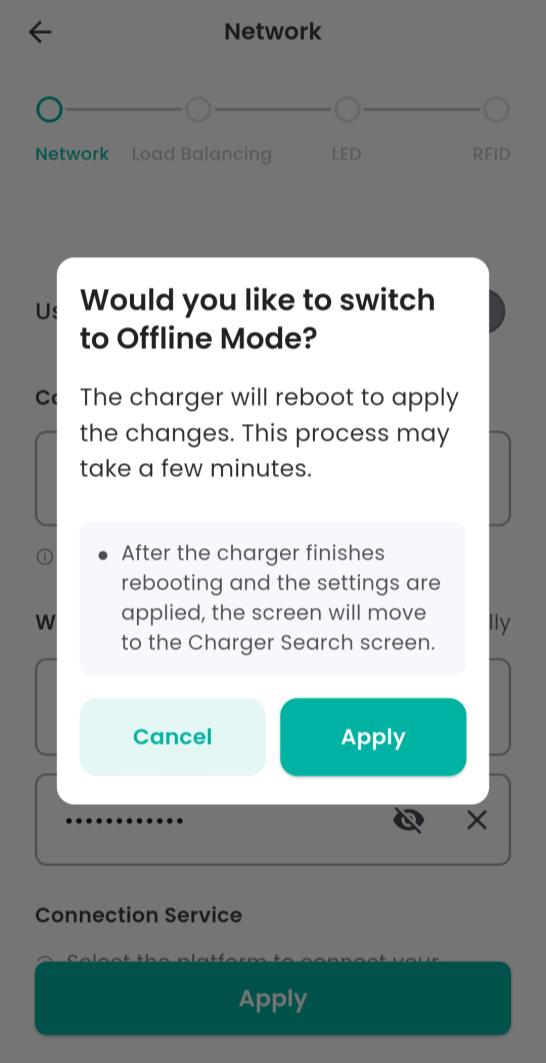
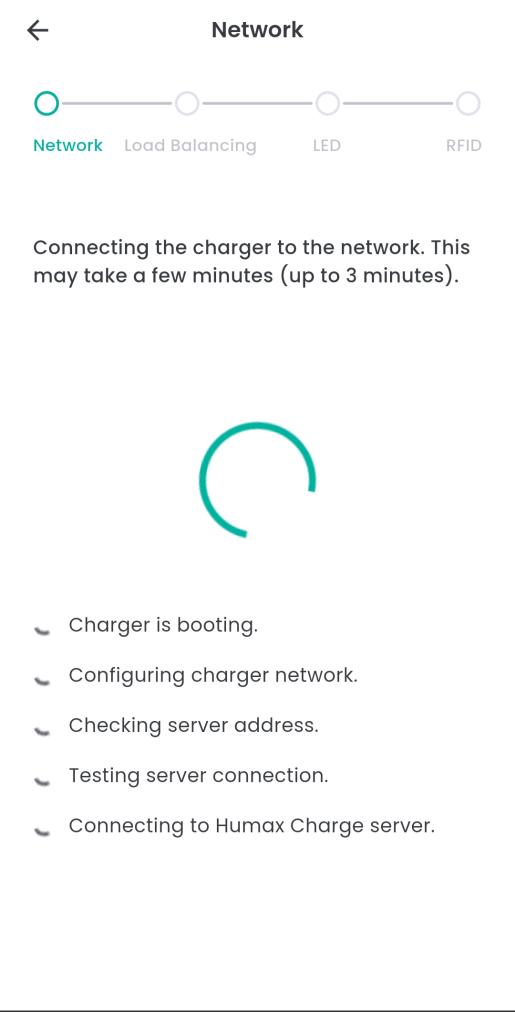
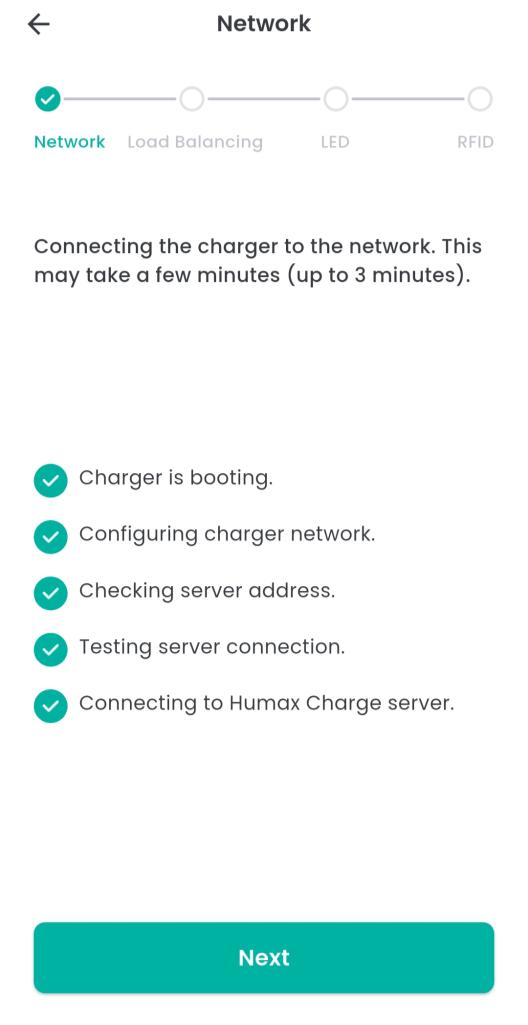
Upon applying the network configuration, the charger will connect to the server.
Please note that this process may take several minutes to complete.
During this process, the charger may reboot (depending on the charger firmware version).
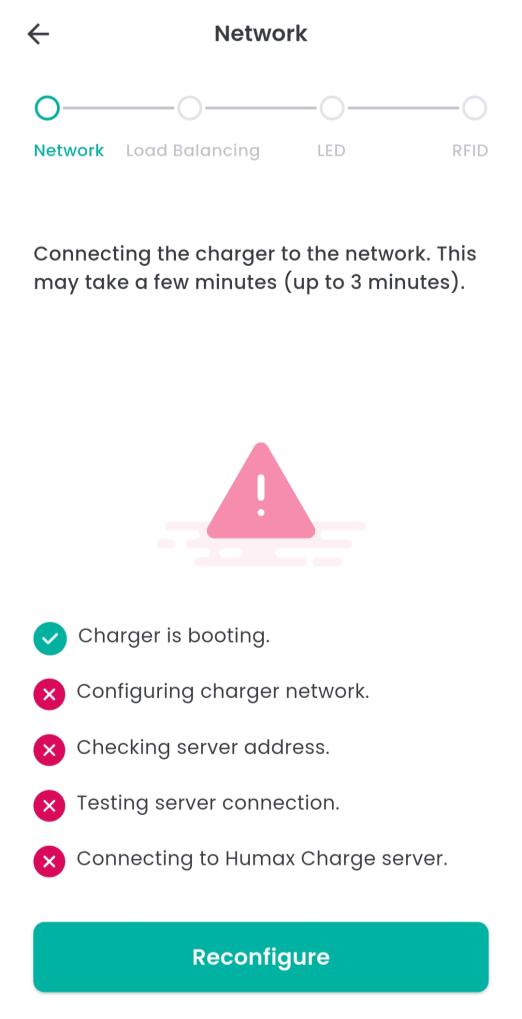
If the network configuration fails, press Reconfigure to return to the previous screen and verify that the information you entered is correct.
2. CT Clamp connection #
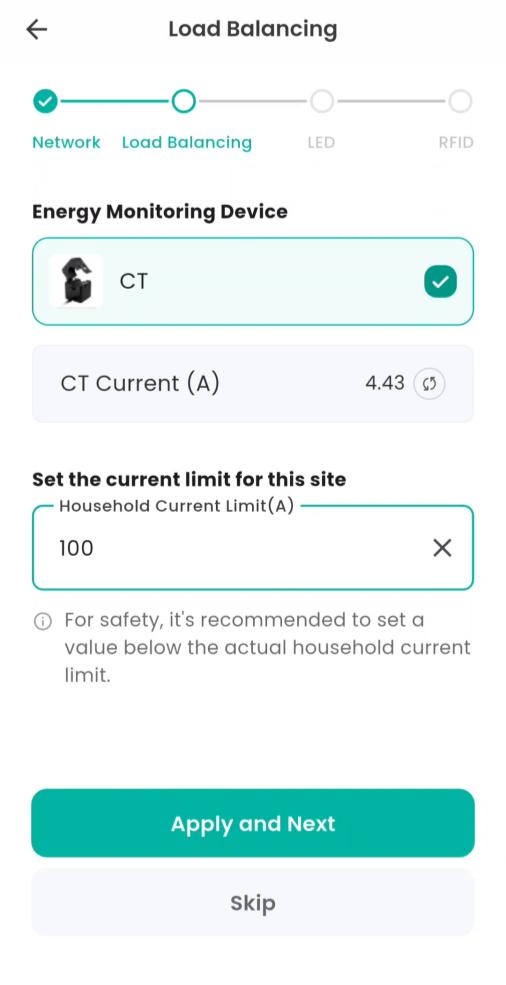
Connect the charger to the energy monitoring
device.
Note: Enable this feature only if energy monitoring
devices are installed.
For UK models, monitoring via CT clamp is supported.
Upon correct installation, CT Current (A) will display a positive value. If the value appears negative, check that the CT clamp is installed in the correct direction and reverse it if necessary.
Check the site’s main fuse rating and set the
appropriate current limit (e.g. 100 A).
Note: Incorrect configuration may cause the charger to malfunction. If this occurs, disable monitoring to verify whether the issue is resolved, then review the installation settings.
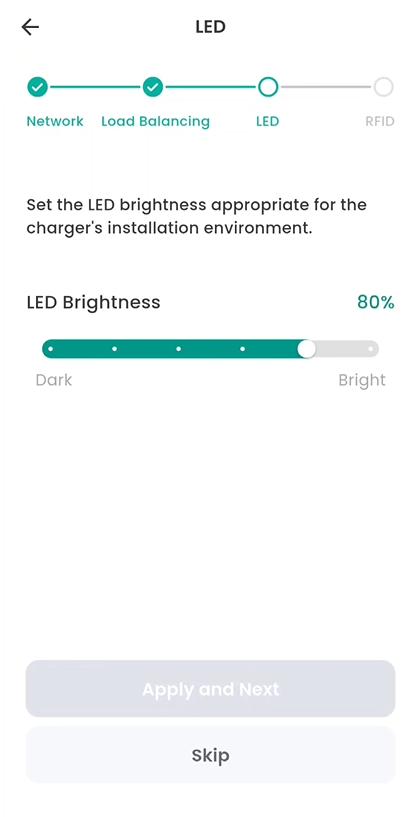
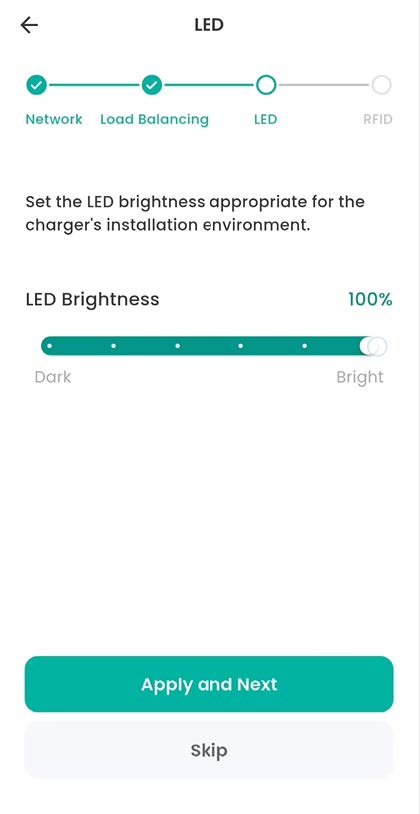
3. Setting LED Brightness #
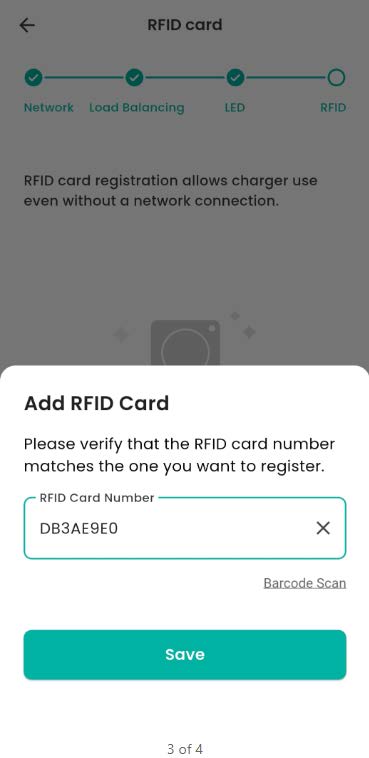
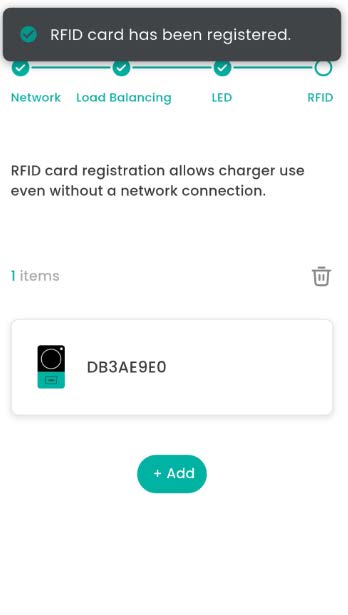
4. Adding RFID card #
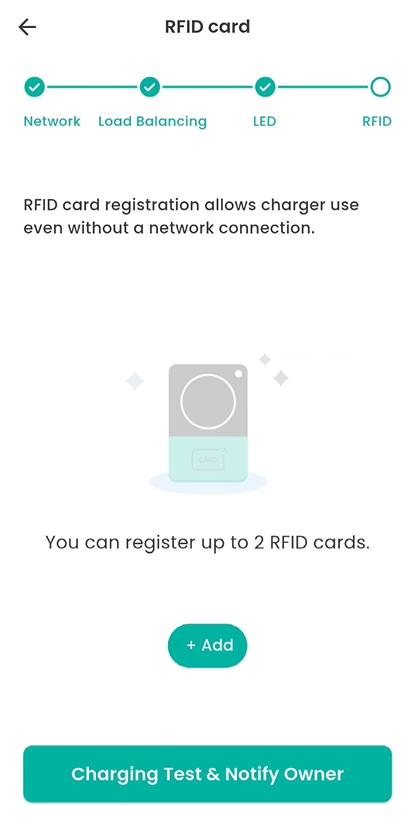
You may register up to two RFID cards.
(a) You can either scan the barcode located on the reverse side of the RFID card using your device’s
camera,
or
(b) Manually enter the RFID information.
5. Completion #
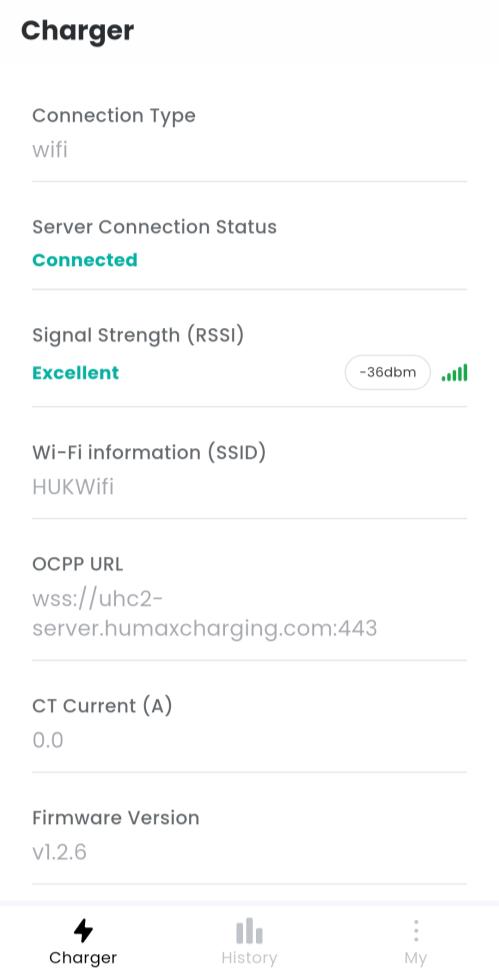
Once setup is complete, you can review the charger’s status.
Tap Basic Information to view the charger status.
Verify that Server Connection Status shows Connected with adequate signal strength.
If the signal strength is too weak, consider using an Ethernet connection or placing a Wi-Fi repeater closer to the charger.
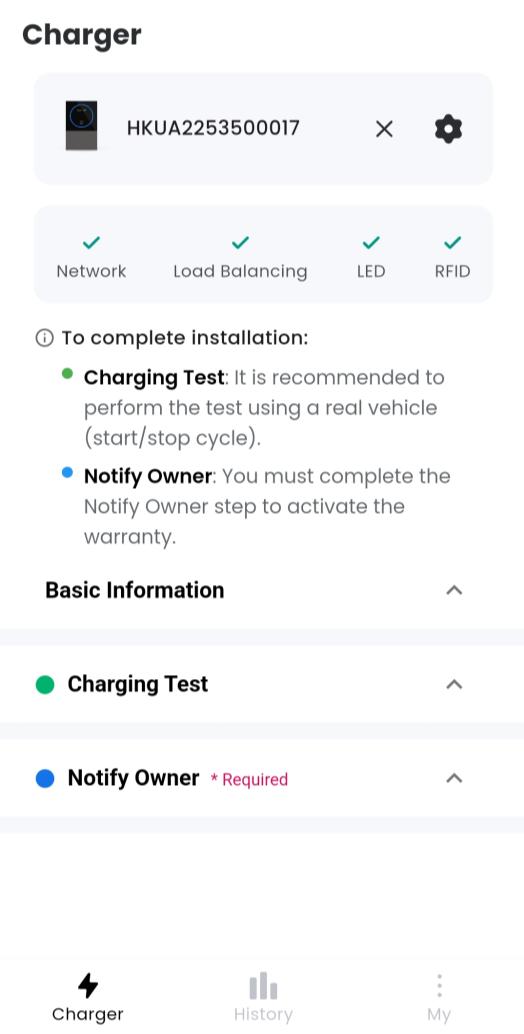
Tap the Charging Test section to test charging.
Note: This option may not be available in some firmware versions.
Quick Test
Start Charging – Connect the charger to the vehicle and select Start Charging.
Stop Charging – Select to stop the session.
If charging does not work as expected, try rebooting the charger or performing a factory reset to restart the setup process.
Recovery
Reboot Charger – Try this first if configuration or charging fails.
Factory Reset Charger – Use this only if the charger does not recover after a reboot.
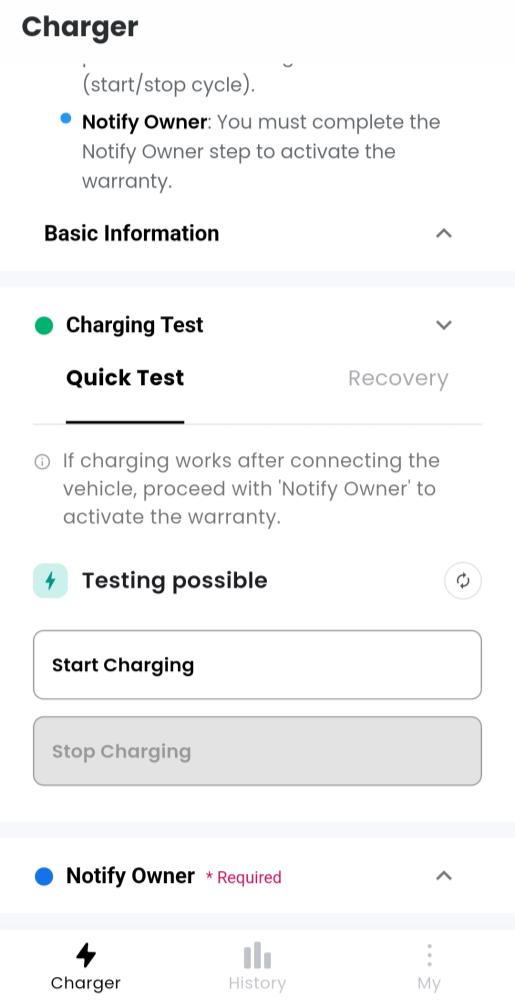

6. Transferring ownership #
Tap Notify Owner and enter the owner’s detail.
The owner will receive a registration email containing a link to download the user App.
