STEP 1.
Verify installation environment #
Confirm the wall material is suitable.
: Concrete, lightweight concrete, hard or soft
natural stone, masonry bricks or hollow
blocks.
Do not install on gypsum board or MDF walls.
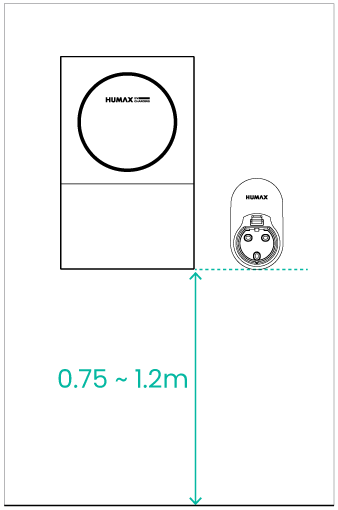
Ensure the charger is installed so that the
user access point (socket or cable holster) is
between 0.75m and 1.2m above the floor.
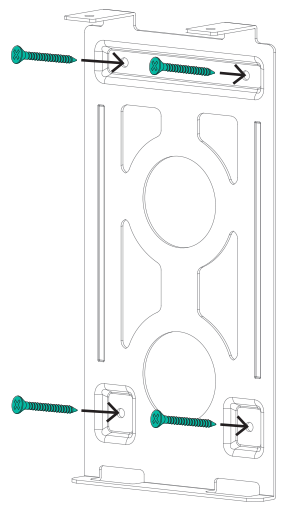
STEP 2.
Mount the bracket #
Ensure that the bracket is mounted with the
bent L-shaped edge facing upward.
Use a Ø8 drill bit to make holes at the 4
designated fixing points on the wall
through the bracket, ensuring a minimum
depth of 60mm.
Then, insert the installation anchor (6x30mm)
into the drilled holes and fasten the screws.
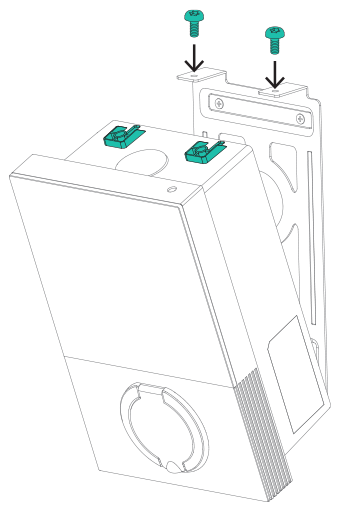
STEP 3.
Secure the charger #
Hang the charger onto the groove of the
wall-mounted bracket.
Firmly fasten it using the provided bracket
screws (Hexalobular, M6x8mm, 1N·m). After
assembly, shake the unit to confirm it is
securely mounted with no looseness.
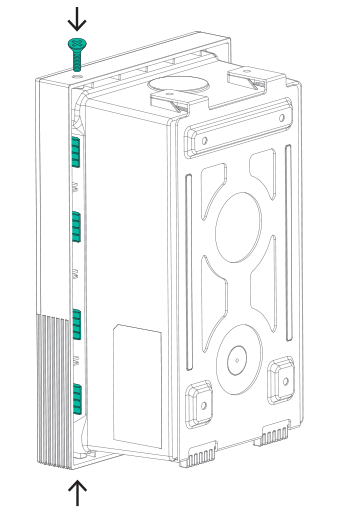
STEP 4.
Open the front cover #
First, release the 4 side hooks on the right
side of the charger to open the front cover.
After completing all the electrical wiring
steps described in the following pages,
fasten the screws (M4x8mm, 1N·m) at the
top and bottom of the front cover to
securely close the unit.